Users, Groups and Permissions
TABLE OF CONTENTS
Add a Group
Only system administrators can create groups, so ensure you are logged into the workbench as a system administrator. You can be in any environment.
- Select Administration > New > Group
- In the Name field type a descriptive name. Add Comments if desired.
- Save the group definition File > Save.
When the Group is saved, it is assigned a unique GenevaERS ID. The time stamps show when the file was created, and when it was last updated.
After the above is complete, the group is ready for immediate use.
Add a User
Only system administrators can create users, so ensure you are logged into the workbench as a system administrator. You can be in any environment.
- Select Administration > New > User
- In the Name field type a descriptive name. Add Comments if desired.
-
- To specify a system administrator, select the System Administrator checkbox.
- To specify a general user, make sure to clear the System Administrator checkbox.
- Save the user definition File > Save.
When the user is saved, it is assigned a unique GenevaERS ID. The time stamps show when the file was created, and when it was last updated.
After the above is complete, a new system administrator user is ready for immediate use.
A new general user must be added as a member of at least one group.
Define Group Membership
Only system administrators can change group membership, so ensure you are logged into the workbench as a system administrator. You can be in any environment.
You can view and add users to groups by selecting a group and viewing and editing the associated users list, or, you can view the user and edit the associated Groups list.
Membership by Group
- Select Administration > Group Security > Membership by Group…
- In the Group field, select a group from the drop down box. You can sort the list by clicking on ID or Name in the header of the list.
- To view the list of existing users in this group, click in the Associated Users table.
- To add users to this group, click Add.
- Select the checkbox(s) by the User ID(s) you want to add, then click OK.
- To remove users, select the checkbox by the User ID in the Associated Users list, then click Remove.
- Save the group membership definition File > Save.
Membership by User
- Select Administration > Group Security > Membership by User…
- In the Users field, select a user from the drop down box. You can sort the list by clicking on ID or Name in the header of the list.
- To view the list of groups this user already is a member of, click in the Associated Groups table.
- To add this user to a new group, click Add.
- Select the checkbox(s) by the Group(s) you want to add, then click OK.
- To remove a user from a group, select the checkbox by the Group ID in the Associated Groups list, then click Remove.
- Save the user membership definition File > Save.
Define Permissions
Only system administrators can modify permissions, so ensure you are logged into the workbench as a system administrator. You can be in any environment.
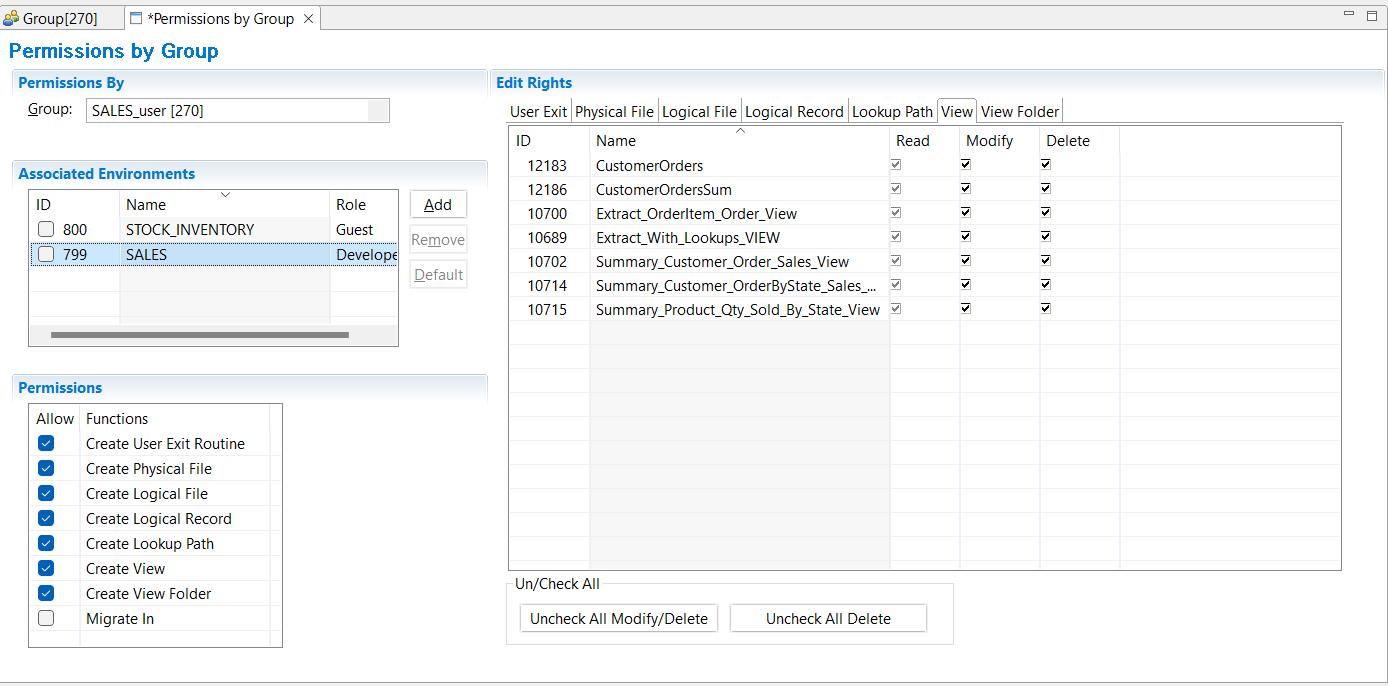
The following describes how to change the permissions for a combination of a group and an associated environment. The new permissions apply to all members of the group.
- Select Administration > Group Security > Permissions by Group…
- In the Group field, select a group from the drop down box. You can sort the list by clicking on ID or Name in the header of the list.
- To view the list of environments already defined in this group, click in the Associated Environments table.
- To add an environment to the list, click Add to display the window “Select components to be associated”.
- Select the checkbox(s) by the environment ID(s) you want to add, then click OK.
- To remove an environment from a group, select the checkbox by the environment ID in the Associated Environments list, then click Remove.
- Assign a Role that members of this group will have in this environment. The choices are Guest, Developer and Administrator. Note: these roles have default Edit Rights and Permissions, but they can be overridden.
- If you wish to use the default settings, save the permissions File > Save
Override the default Permissions and Edit Rights
The following describes how to override the default permissions set above.
- Select Administration > Group Security > Permissions by Group…
- In the Group field, select a group from the drop down box.
- Select the environment you wish to modify permissions for in the Associated Environments table.
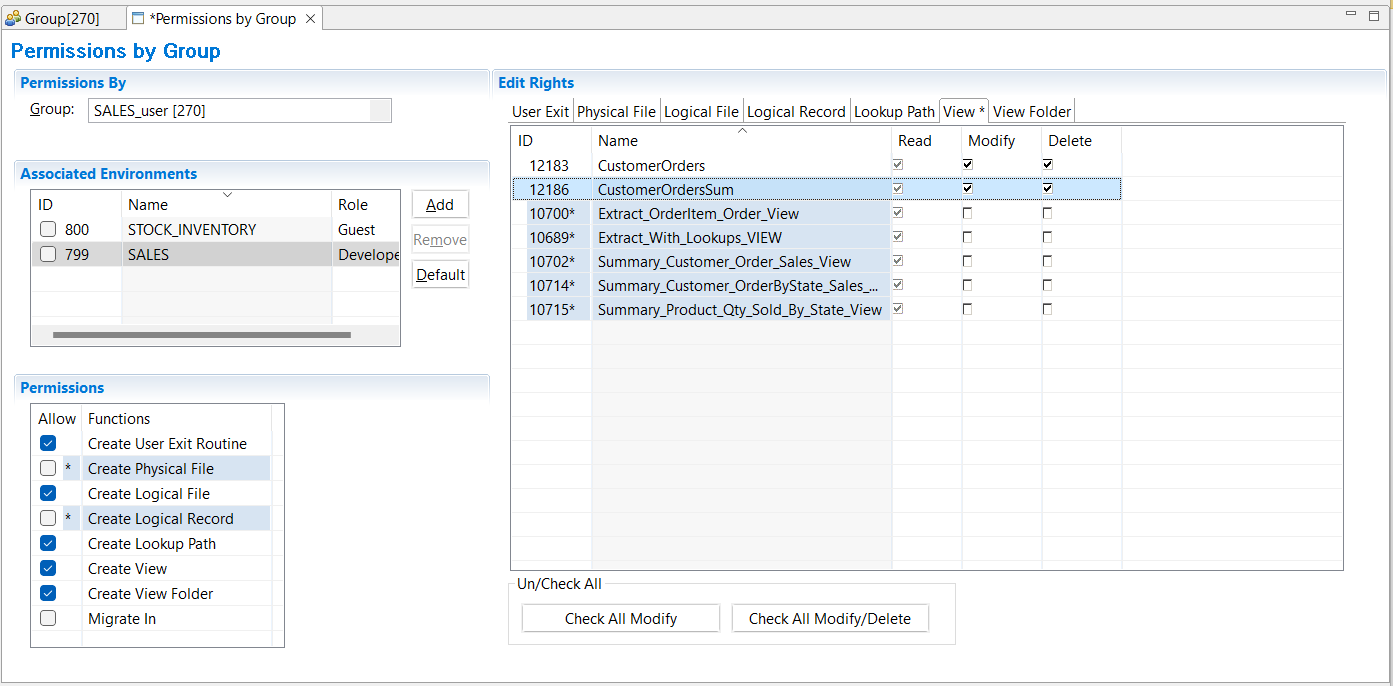
- You can modify Edit rights for each existing item of all metadata types. That is Read, Modify and Delete rights.
- Select the metadata type using the tabs in the Edit Rights table
- Check or uncheck the boxes in the list as required. Use the Uncheck All … buttons as required.
- You can modify the Permissions for this environment, that is the rights to Create different metadata types, and the right to Migrate data into this environment.
- Save the permissions File > Save
- Select another environment and repeat, if required.

If changes are made from the defaults, the changes are marked by *.

To revert to the default setting for the Role, click Default button.